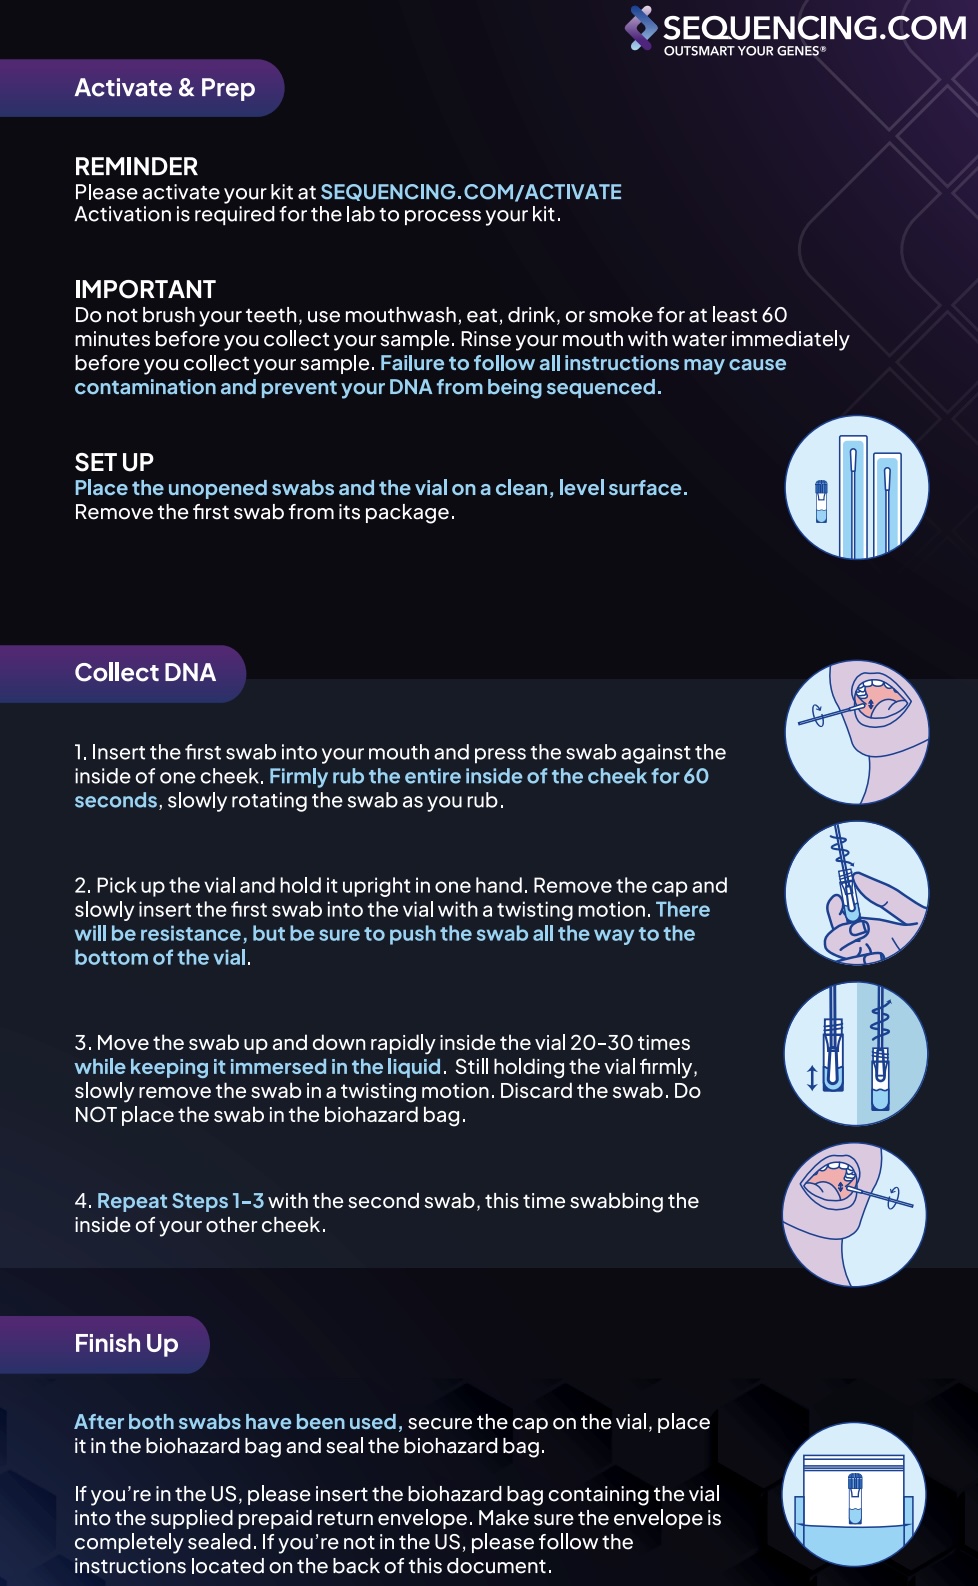
Kit Instructions Blue Top
Instructions for Activating And Using Your Sequencing DNA Collection Kit With Blue Top
Inside of your kit, you'll find a printed set of instructions to guide you through the process. Plus, there's a QR code on the inside of the lid that will take you directly to the Activation Page—super easy and convenient!
Important Reminder: Be sure to activate your kit before sending it back to the lab. Activation is crucial—if the kit isn’t activated, the lab won’t be able to begin the sequencing process. And we want to get started on your results as soon as possible!
Important!
Do Not:
-
Eat, drink (other than water), smoke, brush your teeth, or use mouthwash for at least 1 hour before using the swab.
Do:
-
Wash your mouth with water immediately before using the swab. Swish water around in your mouth and spit it out to help clean your mouth.
-
Make sure to press the swab firmly on the inside of your cheek, avoiding the gums or tongue, and move it around your cheek.
-
Swab each cheek for at least 60 seconds to collect a sufficient sample.
Activating your Kit
-
Activate your kit:
- Go to SEQUENCING.COM/ACTIVATE to activate your kit. Activation is required for the lab to process your sample.
- Go to SEQUENCING.COM/ACTIVATE to activate your kit. Activation is required for the lab to process your sample.
Collecting Your Sample
-
Set up:
- Place the unopened swabs and tube on a clean, level surface.
- Remove the first swab from its packaging.
- Ensure that your Kit ID number matches the identification number on the vial. If the numbers do not match or the kit ID is missing on the tube, contact support at support@sequencing.com.
-
Swabbing:
- Insert the first swab into your mouth and press it firmly against the inside of one cheek.
- Firmly rub the entire inside of your cheek for 60 seconds, slowly rotating the swab as you rub.
-
Insert the swab into the tube:
- Open the tube and insert the swab tip into the tube.
- Make sure the swab goes all the way into the tube. There will be resistance towards the bottom of the tube. This is on purpose to pull the DNA from the swab.
- Push and pull the swab through the tube and resistance 20-30 times.
-
Repeat the process:
- Repeat steps 2 and 3 with the second swab and tube, this time firmly rubbing the inside of your other cheek.
- Repeat steps 2 and 3 with the second swab and tube, this time firmly rubbing the inside of your other cheek.
-
Secure the vials:
- After both swabs have been used, make sure the vial is securely fastened.
- After both swabs have been used, make sure the vial is securely fastened.
-
Packing the tube:
- Place the tube in the biohazard bag and seal the bag.
- Place the tube in the biohazard bag and seal the bag.
-
Returning your kit:
- If you're in the US, place the biohazard bag in the prepaid return envelope and ensure the envelope is sealed.
- If you're outside the US, follow the return instructions located on the back of the document.
Frequently Asked Questions
What if I ate or drank within 30 minutes of collection?
Wait 30 minutes, then collect your sample. This helps ensure sample quality.
How do I know the stabilizer released?
You should feel/hear a click when closing. After closing, invert 10 times—the liquid should visibly mix with your sample.
Can I ship from a different address than I registered?
Yes. Activation ties the Kit ID to your account, not the return address.
How long do results take?
Turnaround depends on the service selected. Check your order confirmation or the Turnaround Times page in your account for current estimates.
What happens if my sample fails quality control?
Our lab will review and, if needed, we’ll arrange a no-cost replacement kit according to our quality policy.
