Here we will show how to quickly integrate Sequencing OAuth2 harnesses into your Objective-C based environment.
We have developed a CocoaPod component to simplify using Objective-C library in your project. If you are new to CocoaPods, refer to the official guide.
There are several prerequisites in order to complete the integration:
- you need to have a Sequencing account
- you need to have an OAuth2 application secret
In order to complete integration follow instructions below
Prepare environment
1) Open existing XCode project or create new one
2) create Podfile in your project directory:
$ pod init
3) specify "sequencing-oauth-api-objc" pod parameters in Podfile
$ pod 'sequencing-oauth-api-objc', '~> 2.0.5'
4) install the dependency in your project using terminal
$ pod install
5) Use Xcode workspace instead of the project file
$ open *.xcworkspace
Configure authorization
1) Add Application Transport Security setting
- open project settings > Info tab
- add App Transport Security Settings row parameter (as Dictionary)
- add subrow to App Transport Security Settings parameter as Exception Domains dictionary parameter
- add subrow to Exception Domains parameter with sequencing.com string value
- add subrow to App Transport Security Settings parameter with Allow Arbitrary Loads boolean value
- set Allow Arbitrary Loads boolean value as YES
![]()
2) Create View Controllers, e.g. for Login screen and for Start screen
3) In your login view controller add imports
#import "SQOAuth.h"

	#import "SQToken.h"

	#import "SQAuthorizationProtocol.h"
For our test feedme application mentioned the section and looking as shown below,
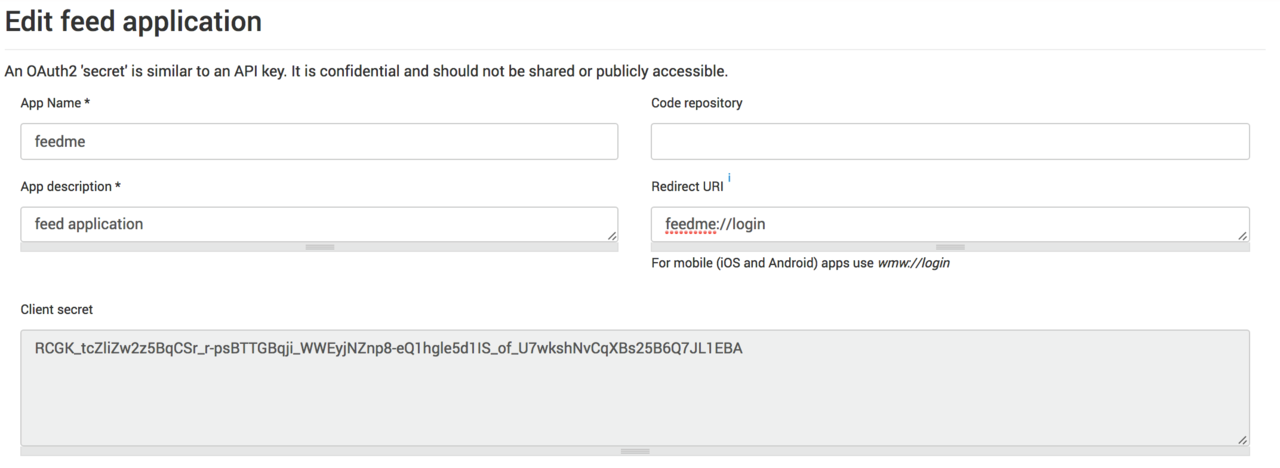
4) Register these parameters in OAuth module instance. Should be done once before authentication happens.
[[SQOAuth sharedInstance] registerApplicationParametersCliendID:@"feedme"

	                                                clientSecret:@"at867K7W88Pxrut1kEFZiOXh2Ij36q6dgEDBZyXte-

	rhYzBqrI_ay609awMD6ZEtGbuPHQnnW9zzncnOpxbdyg"

	                                                 redirectUri:@"feedme://login"

	                                                       scope:@"demo,external"

	                                                    delegate:<your class delegate>

	                                      viewControllerDelegate:<your VC delegate>];
where:
- delegate - class instance that conforms to "SQAuthorizationProtocol" protocol
- viewControllerDelegate - provide your class instance as UI delegate
5) implement methods from SQAuthorizationProtocol
- (void)userIsSuccessfullyAuthorized:(SQToken *)token

	- (void)userIsNotAuthorized

	- (void)userDidCancelAuthorization
6) authorize your user via authorizeUser method
[[SQOAuth sharedInstance] authorizeUser];
In method userIsSuccessfullyAuthorized you'll receive SQToken object, that contains following 5 properties with clear titles for usage:
NSString *accessToken

	NSDate   *expirationDate

	NSString *tokenType

	NSString *scope

	NSString *refreshToken
To receive up-to-date token use token: method from SQOAuth API (it returns the updated token):
 [[SQOAuth sharedInstance] token:^(SQToken *token, NSString *accessToken) {

	 }];
Where SQToken is a instance of SQToken object, and accessToken as NSString
SQOAuth is already aware about possible token expiration and handles this all. Once you need a token using code snippet shown above and it will guarantee token validity.
