Here we will show how to quickly integrate Sequencing OAuth2 harnesses into your Android/Java based environment.
We have developed a Maven/Gradle component to simplify using Sequencing OAuth2 library in your project. If you are new to Maven/Gradle, refer to the official guide.
There are several prerequisites in order to complete the integration:
- you need to have a Sequencing account
- you need to have an OAuth2 application secret
In order to complete integration follow instructions below
Prepare environment
1) Create new or open existing Android Gradle based project (i.e. in Android Studio or Eclipse)
2) Add following Gradle dependency
dependencies {

    compile 'com.sequencing:android-oauth:1.0.22'

}
2) Add Gradle jcenter repository
repositories {

   jcenter()

}
Configure authorization
1) Add imports
import com.sequencing.androidoauth.core.OAuth2Parameters;

import com.sequencing.androidoauth.core.ISQAuthCallback;

import com.sequencing.androidoauth.core.SQUIoAuthHandler;

import com.sequencing.oauth.core.Token;
2) Specify your application parameters at AuthenticationParameters. Authorization plugin use custom url schema.
These parameters should conform your application confiiguration
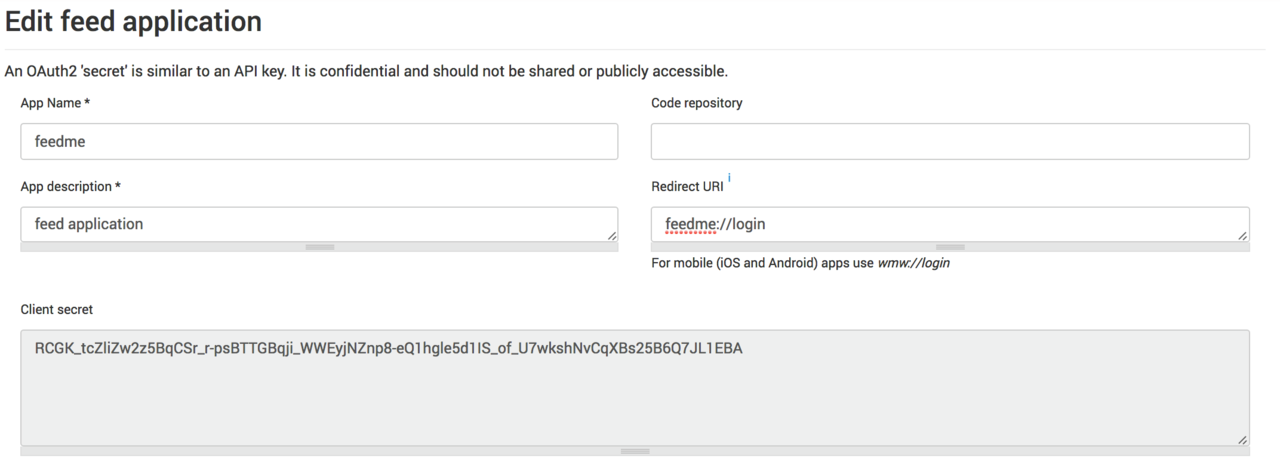
AuthenticationParameters parameters = new AuthenticationParameters.ConfigurationBuilder()

            .withRedirectUri("feedme://login")

            .withClientId("feedme")

            .withClientSecret("RCGK_tcZliZw2z5BqCSr_r-psBTTGBqji_WWEyjNZnp8-eQ1hgle5d1IS_of_U7wkshNvCqXBs25B6Q7JL1EBA")

            .build();
3) Implement ISQAuthCallback, which is needed for your application to get Token passed on successful authentication or to get notified in case authentication failed
/**

 * Callback for handling success authentication

 * @param token token of success authentication

 */

void onAuthentication(Token token);


/**

 * Callback of handling failure authentication

 * @param e exception of failure

 */

void onFailedAuthentication(Exception e);
4) Create View that will serve as initial element for authentication flow. It can be a Button or an extension of View class. Do not define onClickListener for this View.
5) Create SQUIoAuthHandler instance that is handling authentication process
6) Register your authentication handler by invoking method authenticate on SQUIoAuthHandler passing view, callback and app configuration
public void authenticate(View viewLogin, final ISQAuthCallback authCallback, AuthenticationParameters parameters);
